visaselfservice.um.dk Visa Online Application Denmark : Self Service
Name of the Organization : Visa Self Service Denmark
Type of Facility : Visa Online Application
Country : Denmark
Website : https://applyvisa.um.dk/NVP.App/frontpage/
| Want to comment on this post? Go to bottom of this page. |
|---|
Visa Online Application Denmark
When you fill out the Schengen visa application form on this website data is transferred directly to the embassy/consulate.
Related : Ministry of Foreign Affairs Short Stay Visas Denmark :
https://www.statusin.org/11717.html
How To Apply?
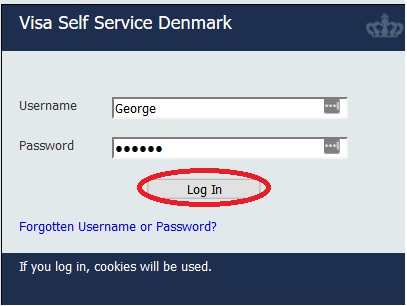
1) Register and log in
2) Start application
3) Fill in the application
4) Check data
5) Select application fee

6) Reserve payment
7) Book appointment (only for some embassys/consulates)
8) Sign cover letter
9) Check status
1) Register and log in:
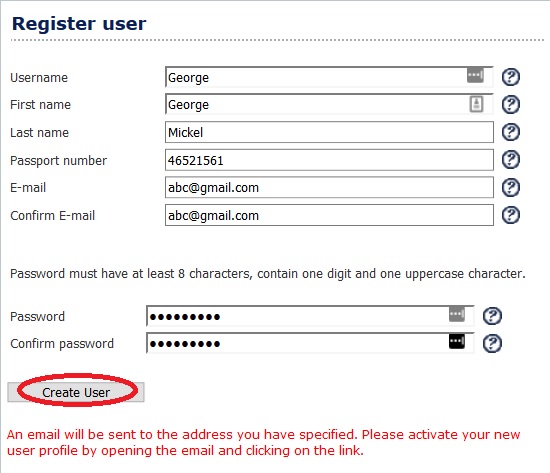
Click on ‘Register user’ to create a login if you have not made a login already. A message will be sent to your email address. In the email there is an activation link. You must click on the link to activate your new user profile.

Please note: This is a website for visa applicants. If you want to register an application on behalf of somebody else, you must register with their name.
2) Start application:
When you are logged in click on ‘Individual application’ or ‘Group application’ if you are travelling in a group.

You can apply up to 3 months before you are travelling. If you apply more than 3 months before, the embassy/consulate will not accept your application.
3) Fill in the application:
Type in the needed information throughout Visa Self Service and read presented texts.
If you need to stop before you have completed the form, click ‘Save’ and log out. When you log in again, you find the unfinished application by clicking on ‘Previous applications’ and then it is possible continue the registration.
4) Check data:
When the form is completed you will see a summary. Please check data in the summary and go back if you need to correct mistakes. If you would like to see the final version of your application click ‘Print application’.
5) Select application fee:
Select fee according to fee regulations. For information about fee see the consulate’s/embassy’s website.
6) Reserve payment:
If you have selected full or reduced fee, you are directed to the payment reservation page. Fill in data from your credit card to reserve the selected amount on your account. When you hand in cover letter and documents at the embassy/consulate the staff will deduct the money from your account and you will get a receipt.
If you select the wrong fee the embassy/consulate will correct the payment according to fee regulations. If you have reserved too small an amount on your account the embassy/consulate will charge you in cash. If the amount you have reserved is greater than the fee you must pay, the embassy/consulate will only withdraw the right amount from your account.
Please note: The money will be deducted from your account automatically after 14 days if you do not hand in the signed cover letter within two weeks after having made the fee reservation online.
7) Book appointment:
You must hand in a signed cover letter and other documentation at the embassy/consulate or at a visa application centre. See embassy/consulate website.
If the embassy/consulate has online booking Visa Self Service directs you to a booking page where you can make an appointment. If the embassy/consulate does not have online booking, you must check the embassy/consulate website to find information about booking an appointment either at the embassy/consulate or at the visa application centre.
Some applicants will have to appear personally in order to have photo and fingerprints (biometrics) recorded. Read more >
8) Sign cover letter:
Print the cover letter and sign it. The embassy/consulate will not start processing your application before they have received the signed cover letter. You hand in the cover letter together with your travel document and other documents needed at the embassy/consulate or at the visa application centre.
9) Check status :
When you have handed in the cover letter and all the required documents (and at some missions your biometrics), the embassy/consulate will start processing your application. Log in to Visa Self Service and click on ‘Previous applications’ to see the status of your application.
Typing Tips
Please make sure you write personal details identical to how it is written in your passport. Please only use characters that are used to write standard English. When you type an address please do not use the sign ‘#’.
I was wondering if anyone can help me, I have not received a reply from the dpo AT um.dk after the registration, the Cover Letter button was not working. I had to change to another laptop then I forgot the password but was able to retrieve it now I guess. Now I don’t see the cover letter anywhere after logged in. Can advise?
I wrote earlier today asking for assistance with my account. Kindly note that I was able to resolve my difficulties and have accessed my account. With many thanks for your attention, and best regards.
Sadly, I forgot my user name and password though I have had visa from you before. You sent me a user name however I could not set a password?
My account has been disabled and the message asks me to contact a System’s Administrator. My user name is mavonkohl1. This is a new user name, I have no matching password.
What should I do to establish a password for mavonkohl1 and get into my account?
Thank you in advance